#container network interface Kubernetes
Explore tagged Tumblr posts
Visit Tumblr Blog
Explore Tumblr blogs with no restrictions, modern design and the best experience.
Last Seen Tumblr Blogs


Fun Fact
Total funding amounts to $125.3M.
Text
Price: [price_with_discount] (as of [price_update_date] - Details) [ad_1] Description This book is a comprehensive guide by expert Luca Berton that equips readers with the skills to proficiently automate configuration management, deployment, and orchestration tasks. Starting with Ansible basics, the book covers workflow, architecture, and environment setup, progressing to executing core tasks such as provisioning, configuration management, application deployment, automation, and orchestration. Advanced topics include Ansible Automation Platform, Morpheus, cloud computing (with an emphasis on Amazon Web Services), and Kubernetes container orchestration. The book addresses common challenges, offers best practices for successful automation implementation, and guides readers in developing a beginner-friendly playbook using Ansible code. With Ansible's widespread adoption and market demand, this guide positions readers as sought-after experts in infrastructure automation. What you will learn ● Gain a comprehensive knowledge of Ansible and its practical applications in Linux and Windows environments. ● Set up and configure Ansible environments, execute automation tasks, and manage configurations. ● Learn advanced techniques such as utilizing the Ansible Automation Platform for improved performance. ● Acquire troubleshooting skills, implement best practices, and design efficient playbooks to streamline operations. Who this book is for This book is targeted towards beginners as well as developers who wish to learn and extract the best out of Ansible for automating their tasks. Whether you are a system administrator, network administrator, developer, or manager, this book caters to all audiences involved in IT operations. No prior knowledge of Ansible is required as the book starts with the basics and gradually progresses to advanced topics. However, familiarity with Linux, command-line interfaces, and basic system administration concepts would be beneficial. Publisher : BPB Publications (20 July 2023) Language : English Paperback : 364 pages ISBN-10 : 9355515596 ISBN-13 : 978-9355515599 Reading age : 15 years and up Item Weight : 690 g Dimensions : 19.05 x 2.13 x 23.5 cm Country of Origin : India Net Quantity : 1.0 Count Generic Name : Book [ad_2]
0 notes
Text
Effective Kubernetes cluster monitoring simplifies containerized workload management by measuring uptime, resource use (such as memory, CPU, and storage), and interaction between cluster components. It also enables cluster managers to monitor the cluster and discover issues such as inadequate resources, errors, pods that fail to start, and nodes that cannot join the cluster. Essentially, Kubernetes monitoring enables you to discover issues and manage Kubernetes clusters more proactively. What Kubernetes Metrics Should You Measure? Monitoring Kubernetes metrics is critical for ensuring the reliability, performance, and efficiency of applications in a Kubernetes cluster. Because Kubernetes constantly expands and maintains containers, measuring critical metrics allows you to spot issues early on, optimize resource allocation, and preserve overall system integrity. Several factors are critical to watch with Kubernetes: Cluster monitoring - Monitors the health of the whole Kubernetes cluster. It helps you find out how many apps are running on a node, if it is performing efficiently and at the right capacity, and how much resource the cluster requires overall. Pod monitoring - Tracks issues impacting individual pods, including resource use, application metrics, and pod replication or auto scaling metrics. Ingress metrics - Monitoring ingress traffic can help in discovering and managing a variety of issues. Using controller-specific methods, ingress controllers can be set up to track network traffic information and workload health. Persistent storage - Monitoring volume health allows Kubernetes to implement CSI. You can also use the external health monitor controller to track node failures. Control plane metrics - With control plane metrics we can track and visualize cluster performance while troubleshooting by keeping an eye on schedulers, controllers, and API servers. Node metrics - Keeping an eye on each Kubernetes node's CPU and memory usage might help ensure that they never run out. A running node's status can be defined by a number of conditions, such as Ready, MemoryPressure, DiskPressure, OutOfDisk, and NetworkUnavailable. Monitoring and Troubleshooting Kubernetes Clusters Using the Kubernetes Dashboard The Kubernetes dashboard is a web-based user interface for Kubernetes. It allows you to deploy containerized apps to a Kubernetes cluster, see an overview of the applications operating on the cluster, and manage cluster resources. Additionally, it enables you to: Debug containerized applications by examining data on the health of your Kubernetes cluster's resources, as well as any anomalies that have occurred. Create and modify individual Kubernetes resources, including deployments, jobs, DaemonSets, and StatefulSets. Have direct control over your Kubernetes environment using the Kubernetes dashboard. The Kubernetes dashboard is built into Kubernetes by default and can be installed and viewed from the Kubernetes master node. Once deployed, you can visit the dashboard via a web browser to examine extensive information about your Kubernetes cluster and conduct different operations like scaling deployments, establishing new resources, and updating application configurations. Kubernetes Dashboard Essential Features Kubernetes Dashboard comes with some essential features that help manage and monitor your Kubernetes clusters efficiently: Cluster overview: The dashboard displays information about your Kubernetes cluster, including the number of nodes, pods, and services, as well as the current CPU and memory use. Resource management: The dashboard allows you to manage Kubernetes resources, including deployments, services, and pods. You can add, update, and delete resources while also seeing extensive information about them. Application monitoring: The dashboard allows you to monitor the status and performance of Kubernetes-based apps. You may see logs and stats, fix issues, and set alarms.
Customizable views: The dashboard allows you to create and preserve bespoke dashboards with the metrics and information that are most essential to you. Kubernetes Monitoring Best Practices Here are some recommended practices to help you properly monitor and debug Kubernetes installations: 1. Monitor Kubernetes Metrics Kubernetes microservices require understanding granular resource data like memory, CPU, and load. However, these metrics may be complex and challenging to leverage. API indicators such as request rate, call error, and latency are the most effective KPIs for identifying service faults. These metrics can immediately identify degradations in a microservices application's components. 2. Ensure Monitoring Systems Have Enough Data Retention Having scalable monitoring solutions helps you to efficiently monitor your Kubernetes cluster as it grows and evolves over time. As your Kubernetes cluster expands, so will the quantity of data it creates, and your monitoring systems must be capable of handling this rise. If your systems are not scalable, they may get overwhelmed by the volume of data and be unable to offer accurate or relevant results. 3. Integrate Monitoring Systems Into Your CI/CD Pipeline Source Integrating Kubernetes monitoring solutions with CI/CD pipelines enables you to monitor your apps and infrastructure as they are deployed, rather than afterward. By connecting your monitoring systems to your pipeline for continuous integration and delivery (CI/CD), you can automatically collect and process data from your infrastructure and applications as it is delivered. This enables you to identify potential issues early on and take action to stop them from getting worse. 4. Create Alerts You may identify the problems with your Kubernetes cluster early on and take action to fix them before they get worse by setting up the right alerts. For example, if you configure alerts for crucial metrics like CPU or memory use, you will be informed when those metrics hit specific thresholds, allowing you to take action before your cluster gets overwhelmed. Conclusion Kubernetes allows for the deployment of a large number of containerized applications within its clusters, each of which has nodes that manage the containers. Efficient observability across various machines and components is critical for successful Kubernetes container orchestration. Kubernetes has built-in monitoring facilities for its control plane, but they may not be sufficient for thorough analysis and granular insight into application workloads, event logging, and other microservice metrics within Kubernetes clusters.
0 notes
Text
Why GPU PaaS Is Incomplete Without Infrastructure Orchestration and Tenant Isolation
GPU Platform-as-a-Service (PaaS) is gaining popularity as a way to simplify AI workload execution — offering users a friendly interface to submit training, fine-tuning, and inferencing jobs. But under the hood, many GPU PaaS solutions lack deep integration with infrastructure orchestration, making them inadequate for secure, scalable multi-tenancy.
If you’re a Neocloud, sovereign GPU cloud, or an enterprise private GPU cloud with strict compliance requirements, you are probably looking at offering job scheduling of Model-as-a-Service to your tenants/users. An easy approach is to have a global Kubernetes cluster that is shared across multiple tenants. The problem with this approach is poor security as the underlying OS kernel, CPU, GPU, network, and storage resources are shared by all users without any isolation. Case-in-point, in September 2024, Wiz discovered a critical GPU container and Kubernetes vulnerability that affected over 35% of environments. Thus, doing just Kubernetes namespace or vCluster isolation is not safe.
You need to provision bare metal, configure network and fabric isolation, allocate high-performance storage, and enforce tenant-level security boundaries — all automated, dynamic, and policy-driven.
In short: PaaS is not enough. True GPUaaS begins with infrastructure orchestration.
The Pitfall of PaaS-Only GPU Platforms
Many AI platforms stop at providing:
A web UI for job submission
A catalog of AI/ML frameworks or models
Basic GPU scheduling on Kubernetes
What they don’t offer:
Control over how GPU nodes are provisioned (bare metal vs. VM)
Enforcement of north-south and east-west isolation per tenant
Configuration and Management of Infiniband, RoCE or Spectrum-X fabric
Lifecycle Management and Isolation of External Parallel Storage like DDN, VAST, or WEKA
Per-Tenant Quota, Observability, RBAC, and Policy Governance
Without these, your GPU PaaS is just a thin UI on top of a complex, insecure, and hard-to-scale backend.
What Full-Stack Orchestration Looks Like
To build a robust AI cloud platform — whether sovereign, Neocloud, or enterprise — the orchestration layer must go deeper.
How aarna.ml GPU CMS Solves This Problem
aarna.ml GPU CMS is built from the ground up to be infrastructure-aware and multi-tenant-native. It includes all the PaaS features you would expect, but goes beyond PaaS to offer:
BMaaS and VMaaS orchestration: Automated provisioning of GPU bare metal or VM pools for different tenants.
Tenant-level network isolation: Support for VXLAN, VRF, and fabric segmentation across Infiniband, Ethernet, and Spectrum-X.
Storage orchestration: Seamless integration with DDN, VAST, WEKA with mount point creation and tenant quota enforcement.
Full-stack observability: Usage stats, logs, and billing metrics per tenant, per GPU, per model.
All of this is wrapped with a PaaS layer that supports Ray, SLURM, KAI, Run:AI, and more, giving users flexibility while keeping cloud providers in control of their infrastructure and policies.
Why This Matters for AI Cloud Providers
If you're offering GPUaaS or PaaS without infrastructure orchestration:
You're exposing tenants to noisy neighbors or shared vulnerabilities
You're missing critical capabilities like multi-region scaling or LLM isolation
You’ll be unable to meet compliance, governance, and SemiAnalysis ClusterMax1 grade maturity
With aarna.ml GPU CMS, you deliver not just a PaaS, but a complete, secure, and sovereign-ready GPU cloud platform.
Conclusion
GPU PaaS needs to be a complete stack with IaaS — it’s not just a model serving interface!
To deliver scalable, secure, multi-tenant AI services, your GPU PaaS stack must be expanded to a full GPU cloud management software stack to include automated provisioning of compute, network, and storage, along with tenant-aware policy and observability controls.
Only then is your GPU PaaS truly production-grade.
Only then are you ready for sovereign, enterprise, and commercial AI cloud success.
To see a live demo or for a free trial, contact aarna.ml
This post orginally posted on https://www.aarna.ml/
0 notes
Text
What Is a Kubernetes Cluster and How Does It Work?
As modern applications increasingly rely on containerized environments for scalability, efficiency, and reliability, Kubernetes has emerged as the gold standard for container orchestration. At the heart of this powerful platform lies the Kubernetes cluster—a dynamic and robust system that enables developers and DevOps teams to deploy, manage, and scale applications seamlessly.
In this blog post, we’ll explore what a Kubernetes cluster is, break down its core components, and explain how it works under the hood. Whether you're an engineer looking to deepen your understanding or a decision-maker evaluating Kubernetes for enterprise adoption, this guide will give you valuable insight into Kubernetes architecture and cluster management.
What Is a Kubernetes Cluster?
A Kubernetes cluster is a set of nodes—machines that run containerized applications—managed by Kubernetes. The cluster coordinates the deployment and operation of containers across these nodes, ensuring high availability, scalability, and fault tolerance.
At a high level, a Kubernetes cluster consists of:
Master Node (Control Plane): Manages the cluster.
Worker Nodes: Run the actual applications in containers.
Together, these components create a resilient system for managing modern microservices-based applications.
Key Components of a Kubernetes Cluster
Let’s break down the core components of a Kubernetes cluster to understand how they work together.
1. Control Plane (Master Node)
The control plane is responsible for the overall orchestration of containers across the cluster. It includes:
kube-apiserver: The front-end of the control plane. It handles REST operations and serves as the interface between users and the cluster.
etcd: A highly available, consistent key-value store that stores cluster data, including configuration and state.
kube-scheduler: Assigns pods to nodes based on resource availability and other constraints.
kube-controller-manager: Ensures that the desired state of the system matches the actual state.
These components work in concert to maintain the cluster’s health and ensure automated container orchestration.
2. Worker Nodes
Each worker node in a Kubernetes environment is responsible for running application workloads. The key components include:
kubelet: An agent that runs on every node and communicates with the control plane.
kube-proxy: Maintains network rules and handles Kubernetes networking for service discovery and load balancing.
Container Runtime (e.g., containerd, Docker): Executes containers on the node.
Worker nodes receive instructions from the control plane and carry out the deployment and lifecycle management of containers.
How Does a Kubernetes Cluster Work?
Here’s how a Kubernetes cluster operates in a simplified workflow:
User Deploys a Pod: You define a deployment or service using a YAML or JSON file and send it to the cluster using kubectl apply.
API Server Validates the Request: The kube-apiserver receives and validates the request, storing the desired state in etcd.
Scheduler Assigns Work: The kube-scheduler finds the best node to run the pod, considering resource requirements, taints, affinity rules, and more.
kubelet Executes the Pod: The kubelet on the selected node instructs the container runtime to start the pod.
Service Discovery & Load Balancing: kube-proxy ensures network traffic is properly routed to the new pod.
The self-healing capabilities of Kubernetes mean that if a pod crashes or a node fails, Kubernetes will reschedule the pod or replace the node automatically.
Why Use a Kubernetes Cluster?
Here are some compelling reasons to adopt Kubernetes clusters in production:
Scalability: Easily scale applications horizontally with auto-scaling.
Resilience: Built-in failover and recovery mechanisms.
Portability: Run your Kubernetes cluster across public clouds, on-premise, or hybrid environments.
Resource Optimization: Efficient use of hardware resources through scheduling and bin-packing.
Declarative Configuration: Use YAML or Helm charts for predictable, repeatable deployments.
Kubernetes Cluster in Enterprise Environments
In enterprise settings, Kubernetes cluster management is often enhanced with tools like:
Helm: For package management.
Prometheus & Grafana: For monitoring and observability.
Istio or Linkerd: For service mesh implementation.
Argo CD or Flux: For GitOps-based CI/CD.
As the backbone of cloud-native infrastructure, Kubernetes clusters empower teams to deploy faster, maintain uptime, and innovate with confidence.
Best Practices for Kubernetes Cluster Management
Use RBAC (Role-Based Access Control) for secure access.
Regularly back up etcd for disaster recovery.
Implement namespace isolation for multi-tenancy.
Monitor cluster health with metrics and alerts.
Keep clusters updated with security patches and Kubernetes upgrades.
Final Thoughts
A Kubernetes cluster is much more than a collection of nodes. It is a highly orchestrated environment that simplifies the complex task of deploying and managing containerized applications at scale. By understanding the inner workings of Kubernetes and adopting best practices for cluster management, organizations can accelerate their DevOps journey and unlock the full potential of cloud-native technology.
0 notes
Text
Tigera extends cloud-native networking with Calico 3.30
Tigera is set to bring a host of new capabilities to cloud-native networking with the debut of the open-source Calico 3.30 release. Calico got its start in 2016 as a networking technology for cloud-native environments, serving as a plug-in to the Kubernetes Container Networking Interface (CNI) component. Over the last decade, the technology has continued to expand, supporting more use cases and…
0 notes
Text
Practical Guide: Debugging Kubernetes Nodes and Managing Docker in Custom Setups
1. Diagnosing Kubernetes Node NotReady Issues Problem: Worker nodes node0 and node1 were stuck in NotReady status. Cause: CNI (Container Network Interface) plugin not initialized. Invalid subnet declaration in 10-bridge.conf (e.g., included hostname/IP instead of CIDR). Fix: Install CNI plugins: wget…
0 notes
Text
Improve Your Software Testing Process: A How-To Guide

Modern software demands modern testing strategies. If you’re aiming to boost quality, reduce release cycles, and ensure smooth user experiences, then it’s time to level up your testing process. This guide explores practical strategies, from shift-left testing to AI-powered automation — centered around one powerful solution: Genqe.ai.
Perform Shift-Left Testing to Catch Defects Early
Shift-left testing is key to improving software quality and reducing late-stage defects. Here’s how to implement it effectively:
Engage QA Early: Involve testers during requirement gathering and design discussions. This ensures near-zero test coverage gaps and surfaces risks early.
Practice Behavior-Driven Development (BDD): With BDD, teams write human-readable test scenarios that align development with business expectations.
Unit Testing: Catch defects at the code level by writing automated unit tests using frameworks like JUnit or TestNG.
Continuous Integration (CI): Integrate code frequently and execute tests with every build to detect issues as early as possible.
Leveraging AI-Driven Test Automation
AI is revolutionizing software testing. With Genqe.ai, you gain real-time, AI-powered codeless automation designed for modern agile environments.
How Genqe.ai Enhances Testing:
AI-Driven Test Case Generation: Genqe.ai analyzes requirements and autonomously creates intelligent test cases.
Predictive Defect Detection: Machine learning identifies high-risk areas based on historical data, focusing test efforts where they’re needed most.
Smart Test Optimization: Genqe.ai reduces test execution time by selecting only the most impactful cases, ensuring coverage without redundancy.
Visual UI Testing: Genqe.ai detects UI mismatches and layout issues across different devices and browsers — perfect for ensuring pixel-perfect designs.
Building Strong Test Automation Frameworks
A reliable test automation framework is the backbone of scalable QA processes.
Test Automation Best Practices with Genqe.ai:
Choose the Right Framework: Genqe.ai simplifies automation by offering a codeless interface — ideal for QA and business teams alike.
Standardized Test Design: Maintain consistency in test case creation with Genqe.ai intuitive visual workflows.
CI/CD Integration: Seamlessly connect Genqe.ai with Jenkins, GitHub Actions, or other CI/CD pipelines to automate testing with every deployment.
Data-Driven Testing: Define parameterized test cases in Genqe.ai to test various input combinations and edge cases efficiently.
Maintainable Architecture: Use Page Object Models and reusable components for long-term maintainability.
Consistency Is Key: Spinning Up a Containerized Test Environment
Flaky tests and inconsistent environments are QA nightmares. The solution? Run your tests in containerized environments like Docker and Kubernetes.
Benefits of Testing in Containers:
Eliminates configuration drift across dev, test, and production.
Enables parallel test execution for rapid feedback.
Simplifies dependency management, ensuring environment parity.
Supports scalable infrastructure to handle complex test scenarios.
Genqe.ai integrates effortlessly with containerized test environments, providing the stability and consistency your team needs.
Extending API Testing with Contract Testing
Contract testing validates interactions between microservices, ensuring they meet shared expectations — before going live.
Genqe.ai for Reliable API Testing:
Mock and Virtualize APIs: Simulate complex interactions and test isolated services effectively.
Automate API Tests: Design, run, and maintain automated API test cases all within Genqe.ai unified platform.
Monitor Performance: Track API response times and detect latency or error spikes early in the process.
Building Resilience: Introduction to Chaos Engineering
Applications must be resilient in the face of real-world chaos — outages, network failures, or resource bottlenecks. Chaos engineering uncovers these weaknesses before users do.
Core Techniques:
Small-Scale Experiments: Inject controlled faults and validate the system’s response.
Defined Hypotheses: Expect specific behaviors from your systems during disruptions.
Chaos Tools Integration: Tools like Gremlin or Litmus can be orchestrated alongside test automation workflows.
Genqe.ai Compatibility: Combine your resilience testing strategies with Genqe.ai to ensure your application remains stable under stress.
Conclusion
Modern software development demands faster releases and higher quality — without compromise. By embracing shift-left testing, AI automation, and scalable infrastructure, teams can achieve faster feedback, fewer defects, and greater confidence in every release.
Genqe.ai makes this transformation not only possible — but seamless. With real-time, codeless, AI-powered automation, Genqe.ai empowers teams to ship faster, test smarter, and build better.
0 notes
Text
The future of Kubernetes networking: Cilium and other CNIs with Canonical Kubernetes
Choosing the right Container Network Interface (CNI) for Kubernetes is critical to achieving optimal performance, security, and scalability. With the launch of Canonical Kubernetes LTS (long-term support) last month, Canonical decided to integrate Cilium as the default CNI in order to reflect our commitment to delivering a modern, security-maintained, high-performance Kubernetes experience. A…
0 notes
Text
Why Red Hat OpenShift?
In today's fast-paced technology landscape, enterprises need a robust, scalable, and secure platform to manage containerized applications efficiently. Red Hat OpenShift has emerged as a leading Kubernetes-based platform designed to empower organizations with seamless application development, deployment, and management. But why should businesses choose Red Hat OpenShift over other alternatives? Let’s explore its key advantages.
1. Enterprise-Grade Kubernetes
While Kubernetes is an excellent open-source container orchestration platform, running and managing it in production environments can be complex. OpenShift simplifies Kubernetes operations by offering:
Automated installation and upgrades
Built-in security features
Enterprise support from Red Hat
2. Enhanced Developer Productivity
OpenShift provides a developer-friendly environment with integrated tools for continuous integration and continuous deployment (CI/CD). Features such as:
Source-to-Image (S2I) for automated container builds
Developer consoles with an intuitive interface
OpenShift Pipelines for streamlined CI/CD workflows help teams accelerate software delivery without deep Kubernetes expertise.
3. Security and Compliance
Security is a top priority for enterprises, and OpenShift comes with built-in security measures, including:
Role-Based Access Control (RBAC) for fine-grained permissions
Image scanning and policy enforcement
Secure container runtimes with SELinux integration This makes OpenShift a preferred choice for businesses needing compliance with industry regulations.
4. Hybrid and Multi-Cloud Flexibility
OpenShift is designed to run seamlessly across on-premise data centers, private clouds, and public cloud providers like AWS, Azure, and Google Cloud. This flexibility allows businesses to:
Avoid vendor lock-in
Maintain a consistent deployment experience
Optimize workloads across different environments
5. Integrated DevOps and GitOps
With OpenShift, teams can adopt modern DevOps and GitOps practices effortlessly. OpenShift GitOps (based on ArgoCD) enables organizations to manage infrastructure and applications declaratively using Git repositories, ensuring:
Version-controlled deployments
Automated rollbacks and updates
Enhanced collaboration between Dev and Ops teams
6. Streamlined Application Modernization
Organizations looking to modernize legacy applications can leverage OpenShift’s built-in support for:
Microservices architectures
Serverless computing (Knative integration)
Service mesh (Istio) for advanced networking and observability
Conclusion
Red Hat OpenShift is not just another Kubernetes distribution; it’s a complete enterprise Kubernetes platform that simplifies deployment, enhances security, and fosters innovation. Whether you're a startup or a large enterprise, OpenShift provides the scalability, automation, and support needed to thrive in a cloud-native world.
Are you ready to leverage OpenShift for your business? Contact us at HawkStack Technologies to explore how we can help you with your OpenShift journey!
For more details www.hawkstack.com
0 notes
Text
Networking in OpenShift Virtualization: A Deep Dive
OpenShift Virtualization is a powerful extension of Red Hat OpenShift that enables you to run and manage virtual machines (VMs) alongside containerized workloads. Networking plays a crucial role in OpenShift Virtualization, ensuring seamless communication between VMs, containers, and external systems. In this blog, we will explore the core components and configurations that make networking in OpenShift Virtualization robust and flexible.
Key Networking Components
Multus CNI (Container Network Interface):
OpenShift Virtualization leverages Multus CNI to enable multiple network interfaces per pod or VM.
This allows VMs to connect to different networks, such as internal pod networks and external VLANs.
KubeVirt:
Acts as the core virtualization engine, providing networking capabilities for VMs.
Integrates with OpenShift’s SDN (Software-Defined Networking) to offer seamless communication.
OVN-Kubernetes:
The default SDN in OpenShift that provides Layer 2 and Layer 3 networking.
Ensures high performance and scalability for both VMs and containers.
Networking Models in OpenShift Virtualization
OpenShift Virtualization offers several networking models tailored to different use cases:
Pod Networking:
VMs use the same network as Kubernetes pods.
Simplifies communication between VMs and containerized workloads.
For example, a VM hosting a database can easily connect to application pods within the same namespace.
Bridge Networking:
Provides direct access to the host network.
Ideal for workloads requiring low latency or specialized networking protocols.
SR-IOV (Single Root I/O Virtualization):
Enables direct access to physical NICs (Network Interface Cards) for high-performance applications.
Suitable for workloads like real-time analytics or financial applications that demand low latency and high throughput.
MACVLAN Networking:
Assigns a unique MAC address to each VM for direct communication with external networks.
Simplifies integration with legacy systems.
Network Configuration Workflow
Define Network Attachments:
Create additional network attachments to connect VMs to different networks.
Attach Networks to VMs:
Add network interfaces to VMs to enable multi-network communication.
Configure Network Policies:
Set up rules to control traffic flow between VMs, pods, and external systems.
Best Practices
Plan Your Network Topology:
Understand your workload requirements and choose the appropriate networking model.
Use SR-IOV for high-performance workloads and Pod Networking for general-purpose workloads.
Secure Your Networks:
Implement Network Policies to restrict traffic based on namespaces, labels, or CIDR blocks.
Enable encryption for sensitive communications.
Monitor and Troubleshoot:
Use tools like OpenShift Console and kubectl for monitoring and debugging.
Analyze logs and metrics to ensure optimal performance.
Leverage Automation:
Automate network configuration and deployments using infrastructure-as-code tools.
Conclusion
Networking in OpenShift Virtualization is a sophisticated and flexible system that ensures seamless integration of VMs and containers. By leveraging its diverse networking models and following best practices, you can build a robust and secure environment for your workloads. Whether you are modernizing legacy applications or scaling cloud-native workloads, OpenShift Virtualization has the tools to meet your networking needs.
For more information visit: https://www.hawkstack.com/
0 notes
Text
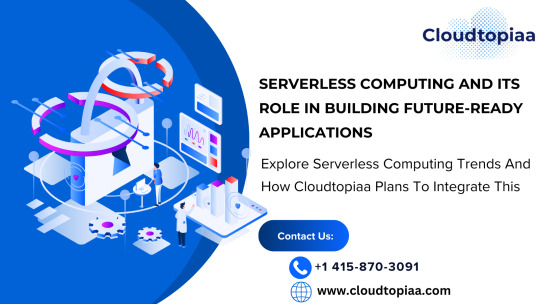
Serverless Computing and Its Role in Building Future-Ready Applications
The digital era demands applications that are agile, scalable, and cost-effective to meet the rapidly changing needs of users. Serverless computing has emerged as a transformative approach, empowering developers to focus on innovation without worrying about infrastructure management.
In this blog, we’ll delve into serverless computing, the trends shaping its adoption, and how Cloudtopiaa is preparing to integrate this game-changing technology to help businesses build future-ready applications.
What is Serverless Computing?
Serverless computing doesn’t mean there are no servers involved — it means developers no longer have to manage them. With serverless architecture, cloud providers handle the backend operations, such as provisioning, scaling, and maintenance.
Key characteristics of serverless computing include:
On-Demand Scalability: Resources are allocated dynamically based on application requirements.
Pay-as-You-Go Pricing: Businesses are billed only for the exact resources consumed during runtime.
Developer-Centric Approach: Developers can focus on code and features, leaving infrastructure management to the cloud provider.
Popular services like AWS Lambda, Google Cloud Functions, and Microsoft Azure Functions have paved the way for serverless adoption.
Why Serverless is the Future of Application Development
1. Increased Agility for Developers
By removing the burden of infrastructure management, serverless computing enables developers to focus on building features and deploying updates faster.
2. Cost Efficiency
With traditional setups, businesses often pay for idle server time. Serverless ensures that costs align directly with usage, leading to significant savings.
3. Scalability Without Complexity
Applications running on serverless architectures can automatically scale up or down based on traffic, ensuring seamless performance during peak times.
4. Environmentally Friendly
Serverless architectures optimize resource usage, reducing energy consumption and contributing to sustainability goals.
5. Future-Proof Applications
As businesses grow, serverless computing adapts, providing the flexibility and scalability required for long-term success.
Emerging Trends in Serverless Computing
Multi-Cloud and Hybrid Deployments: Businesses are adopting serverless models across multiple cloud providers or integrating them with on-premises systems.
Event-Driven Architectures: Serverless is becoming the backbone for event-driven systems that process real-time data, such as IoT and analytics applications.
AI and Machine Learning Workflows: Developers are leveraging serverless functions to power AI/ML models with reduced costs and faster processing times.
Container Integration: Serverless is blending with container technologies like Kubernetes to provide even greater flexibility.
How Cloudtopiaa is Preparing for the Serverless Revolution
At Cloudtopiaa, we believe serverless computing is essential for building future-ready applications. Here’s how we’re integrating serverless into our ecosystem:
1. Simplified Serverless Deployments
We’re developing tools that make it seamless for businesses to deploy serverless applications without requiring extensive expertise.
2. Flexible Workflows
Cloudtopiaa’s serverless solutions will support a wide range of use cases, from APIs and microservices to real-time data processing.
3. Cost-Effective Pricing Models
Our pay-as-you-go serverless infrastructure ensures businesses only pay for the resources they consume, maximizing ROI.
4. Developer-Centric Tools
We’re focused on providing user-friendly interfaces, SDKs, and APIs that allow developers to launch serverless functions efficiently.
5. Integration with Cloudtopiaa’s Ecosystem
Serverless computing will be fully integrated with our existing services, including compute instances, storage, and networking, providing a unified platform for all your needs.
Use Cases for Serverless Computing with Cloudtopiaa
E-Commerce: Handle high-traffic events like flash sales by automatically scaling serverless functions.
IoT Applications: Process real-time sensor data efficiently without worrying about backend scaling.
Content Delivery: Optimize media streaming and image processing pipelines for better user experiences.
AI/ML Workflows: Run model inference tasks cost-effectively using serverless functions.
Why Businesses Should Embrace Serverless Now
Adopting serverless computing offers immediate and long-term benefits, such as:
Faster time-to-market for new applications.
Simplified scaling for unpredictable workloads.
Lower operational costs by eliminating server management.
Businesses partnering with Cloudtopiaa for serverless solutions gain access to cutting-edge tools and support, ensuring a smooth transition to this powerful model.
Final Thoughts
Serverless computing is more than a trend — it’s the future of application development. By enabling agility, scalability, and cost-efficiency, it empowers businesses to stay competitive in an ever-evolving landscape.
Cloudtopiaa is committed to helping businesses harness the potential of serverless computing. Stay tuned for our upcoming serverless offerings that will redefine how you build, deploy, and scale applications.
Contact us today to explore how Cloudtopiaa can support your journey into serverless architecture and beyond.
#ServerlessComputing #CloudComputing #FutureReadyApps #TechInnovation #ServerlessArchitecture #ScalableSolutions #DigitalTransformation #ModernDevelopment #CloudNativeApps #TechTrends
0 notes
Text
Ensuring Policy Compliance with Kubernetes Network Policies and Container Networking Interfaces
Ensuring Policy Compliance with Kubernetes Network Policies and CNI Introduction Kubernetes Network Policies and Container Network Interface (CNI) are crucial components of a Kubernetes cluster’s network infrastructure. They enable administrators to define and enforce network policies that ensure secure communication between pods and services. However, managing these policies can be complex,…
0 notes
Text
In today’s modern software development world, container orchestration has become an essential practice. Imagine containers as tiny, self-contained boxes holding your application and all it needs to run; lightweight, portable, and ready to go on any system. However, managing a swarm of these containers can quickly turn into chaos. That's where container orchestration comes in to assist you. In this article, let’s explore the world of container orchestration. What Is Container Orchestration? Container orchestration refers to the automated management of containerized applications. It involves deploying, managing, scaling, and networking containers to ensure applications run smoothly and efficiently across various environments. As organizations adopt microservices architecture and move towards cloud-native applications, container orchestration becomes crucial in handling the complexity of deploying and maintaining numerous container instances. Key Functions of Container Orchestration Deployment: Automating the deployment of containers across multiple hosts. Scaling: Adjusting the number of running containers based on current load and demand. Load balancing: Distributing traffic across containers to ensure optimal performance. Networking: Managing the network configurations to allow containers to communicate with each other. Health monitoring: Continuously checking the status of containers and replacing or restarting failed ones. Configuration management: Keeping the container configurations consistent across different environments. Why Container Orchestration Is Important? Efficiency and Resource Optimization Container orchestration takes the guesswork out of resource allocation. By automating deployment and scaling, it makes sure your containers get exactly what they need, no more, no less. As a result, it keeps your hardware working efficiently and saves you money on wasted resources. Consistency and Reliability Orchestration tools ensure that containers are consistently configured and deployed, reducing the risk of errors and improving the reliability of applications. Simplified Management Managing a large number of containers manually is impractical. Orchestration tools simplify this process by providing a unified interface to control, monitor, and manage the entire lifecycle of containers. Leading Container Orchestration Tools Kubernetes Kubernetes is the most widely used container orchestration platform. Originally developed by Google and now maintained by the Cloud Native Computing Foundation (CNCF), Kubernetes offers a comprehensive set of features for deploying, scaling, and managing containerized applications. Docker Swarm Docker Swarm is Docker's native clustering and orchestration tool. It integrates seamlessly with Docker and is known for its simplicity and ease of use. Apache Mesos Apache Mesos is a distributed systems kernel that can manage resources across a cluster of machines. It supports various frameworks, including Kubernetes, for container orchestration. OpenShift OpenShift is an enterprise-grade Kubernetes distribution by Red Hat. It offers additional features for developers and IT operations teams to manage the application lifecycle. Best Practices for Container Orchestration Design for Scalability Design your applications to scale effortlessly. Imagine adding more containers as easily as stacking building blocks which means keeping your app components independent and relying on external storage for data sharing. Implement Robust Monitoring and Logging Keep a close eye on your containerized applications' health. Tools like Prometheus, Grafana, and the ELK Stack act like high-tech flashlights, illuminating performance and helping you identify any issues before they become monsters under the bed. Automate Deployment Pipelines Integrate continuous integration and continuous deployment (CI/CD) pipelines with your orchestration platform.
This ensures rapid and consistent deployment of code changes, freeing you up to focus on more strategic battles. Secure Your Containers Security is vital in container orchestration. Implement best practices such as using minimal base images, regularly updating images, running containers with the least privileges, and employing runtime security tools. Manage Configuration and Secrets Securely Use orchestration tools' built-in features for managing configuration and secrets. For example, Kubernetes ConfigMaps and Secrets allow you to decouple configuration artifacts from image content to keep your containerized applications portable. Regularly Update and Patch Your Orchestration Tools Stay current with updates and patches for your orchestration tools to benefit from the latest features and security fixes. Regular maintenance reduces the risk of vulnerabilities and improves system stability.
0 notes
Text
Google Cloud (GCP) Platform: GCP Essentials, Cloud Computing, GCP Associate Cloud Engineer, and Professional Cloud Architect
Introduction
Google Cloud Platform (GCP) is one of the leading cloud computing platforms, offering a range of services and tools for businesses and individuals to build, deploy, and manage applications on Google’s infrastructure. In this guide, we’ll dive into the essentials of GCP, explore cloud computing basics, and examine two major GCP certifications: the Associate Cloud Engineer and Professional Cloud Architect. Whether you’re a beginner or aiming to level up in your cloud journey, understanding these aspects of GCP is essential for success.
1. Understanding Google Cloud Platform (GCP) Essentials
Google Cloud Platform offers over 90 products covering compute, storage, networking, and machine learning. Here are the essentials:
Compute Engine: Virtual machines on demand
App Engine: Platform as a Service (PaaS) for app development
Kubernetes Engine: Managed Kubernetes for container orchestration
Cloud Functions: Serverless execution for event-driven functions
BigQuery: Data warehouse for analytics
Cloud Storage: Scalable object storage for any amount of data
With these foundational services, GCP allows businesses to scale, innovate, and adapt to changing needs without the limitations of traditional on-premises infrastructure.
2. Introduction to Cloud Computing
Cloud computing is the delivery of on-demand computing resources over the internet. These resources include:
Infrastructure as a Service (IaaS): Basic computing, storage, and networking resources
Platform as a Service (PaaS): Development tools and environment for building apps
Software as a Service (SaaS): Fully managed applications accessible via the internet
In a cloud environment, users pay for only the resources they use, allowing them to optimize cost, increase scalability, and ensure high availability.
3. GCP Services and Tools Overview
GCP provides a suite of tools for development, storage, machine learning, and data analysis:
AI and Machine Learning Tools: Google Cloud ML, AutoML, and TensorFlow
Data Management: Datastore, Firestore, and Cloud SQL
Identity and Security: Identity and Access Management (IAM), Key Management
Networking: VPC, Cloud CDN, and Cloud Load Balancing
4. Getting Started with GCP Essentials
To start with GCP, you need a basic understanding of cloud infrastructure:
Create a GCP Account: You’ll gain access to a free tier with $300 in credits.
Explore the GCP Console: The console provides a web-based interface for managing resources.
Google Cloud Shell: A command-line interface that runs in the cloud, giving you quick access to GCP tools and resources.
5. GCP Associate Cloud Engineer Certification
The Associate Cloud Engineer certification is designed for beginners in the field of cloud engineering. This certification covers:
Managing GCP Services: Setting up projects and configuring compute resources
Storage and Databases: Working with storage solutions like Cloud Storage, Bigtable, and SQL
Networking: Configuring network settings and VPCs
IAM and Security: Configuring access management and security protocols
This certification is ideal for entry-level roles in cloud administration and engineering.
6. Key Topics for GCP Associate Cloud Engineer Certification
The main topics covered in the exam include:
Setting up a Cloud Environment: Creating and managing GCP projects and billing accounts
Planning and Configuring a Cloud Solution: Configuring VM instances and deploying storage solutions
Ensuring Successful Operation: Managing resources and monitoring solutions
Configuring Access and Security: Setting up IAM and implementing security best practices
7. GCP Professional Cloud Architect Certification
The Professional Cloud Architect certification is an advanced-level certification. It prepares professionals to:
Design and Architect GCP Solutions: Creating scalable and efficient solutions that meet business needs
Optimize for Security and Compliance: Ensuring GCP solutions meet security standards
Manage and Provision GCP Infrastructure: Deploying and managing resources to maintain high availability and performance
This certification is ideal for individuals in roles involving solution design, architecture, and complex cloud deployments.
8. Key Topics for GCP Professional Cloud Architect Certification
Key areas covered in the Professional Cloud Architect exam include:
Designing Solutions for High Availability: Ensuring solutions remain available even during failures
Analyzing and Optimizing Processes: Ensuring that processes align with business objectives
Managing and Provisioning Infrastructure: Creating automated deployments using tools like Terraform and Deployment Manager
Compliance and Security: Developing secure applications that comply with industry standards
9. Preparing for GCP Certifications
Preparation for GCP certifications involves hands-on practice and understanding key concepts:
Use GCP’s Free Tier: GCP offers a free trial with $300 in credits for testing services.
Enroll in Training Courses: Platforms like Coursera and Google’s Qwiklabs offer courses for each certification.
Practice Labs: Qwiklabs provides guided labs to help reinforce learning with real-world scenarios.
Practice Exams: Test your knowledge with practice exams to familiarize yourself with the exam format.
10. Best Practices for Cloud Engineers and Architects
Follow GCP’s Best Practices: Use Google’s architecture framework to design resilient solutions.
Automate Deployments: Use IaC tools like Terraform for consistent deployments.
Monitor and Optimize: Use Cloud Monitoring and Cloud Logging to track performance.
Cost Management: Utilize GCP’s Billing and Cost Management tools to control expenses.
Conclusion
Whether you aim to become a GCP Associate Cloud Engineer or a Professional Cloud Architect, GCP certifications provide a valuable pathway to expertise. GCP’s comprehensive services and tools make it a powerful choice for anyone looking to expand their cloud computing skills.
0 notes
Text
Google VPC Flow Logs: Vital Network Traffic Analysis Tool
GCP VPC Flow Logs
Virtual machine (VM) instances, such as instances utilized as Google Kubernetes Engine nodes, as well as packets transported across VLAN attachments for Cloud Interconnect and Cloud VPN tunnels, are sampled in VPC Flow Logs (Preview).
IP connections are used to aggregate flow logs (5-tuple). Network monitoring, forensics, security analysis, and cost optimization are all possible uses for these data.
Flow logs are viewable via Cloud Logging, and logs can be exported to any location supported by Cloud Logging export.
Use cases
Network monitoring
VPC Flow Logs give you insight into network performance and throughput. You could:
Observe the VPC network.
Diagnose the network.
To comprehend traffic changes, filter the flow records by virtual machines, VLAN attachments, and cloud VPN tunnels.
Recognize traffic increase in order to estimate capacity.
Recognizing network utilization and minimizing network traffic costs
VPC Flow Logs can be used to optimize network traffic costs by analyzing network utilization. The network flows, for instance, can be examined for the following:
Movement between zones and regions
Internet traffic to particular nations
Traffic to other cloud networks and on-premises
Top network talkers, such as cloud VPN tunnels, VLAN attachments, and virtual machines
Forensics of networks
VPC Flow Logs are useful for network forensics. For instance, in the event of an occurrence, you can look at the following:
Whom and when did the IPs speak with?
Analyzing all incoming and outgoing network flows will reveal any hacked IPs.
Specifications
Andromeda, the program that runs VPC networks, includes VPC Flow Logs. VPC Flow Logs don’t slow down or affect performance when they’re enabled.
Legacy networks are not compatible with VPC Flow Logs. You can turn on or off the Cloud VPN tunnel (Preview), VLAN attachment for Cloud Interconnect (Preview), and VPC Flow Logs for each subnet. VPC Flow Logs gathers information from all virtual machine instances, including GKE nodes, inside a subnet if it is enabled for that subnet.
TCP, UDP, ICMP, ESP, and GRE traffic are sampled by VPC Flow Logs. Samples are taken of both inbound and outgoing flows. These flows may occur within Google Cloud or between other networks and Google Cloud. VPC Flow Logs creates a log for a flow if it is sampled and collected. The details outlined in the Record format section are included in every flow record.
The following are some ways that VPC Flow Logs and firewall rules interact:
Prior to egress firewall rules, egress packets are sampled. VPC Flow Logs can sample outgoing packets even if an egress firewall rule blocks them.
Following ingress firewall rules, ingress packets are sampled. VPC Flow Logs do not sample inbound packets that are denied by an ingress firewall rule.
In VPC Flow Logs, you can create only specific logs by using filters.
Multiple network interface virtual machines (VMs) are supported by VPC Flow Logs. For every subnet in every VPC that has a network interface, you must enable VPC Flow Logs.
Intranode visibility for the cluster must be enabled in order to log flows across pods on the same Google Kubernetes Engine (GKE) node.
Cloud Run resources do not report VPC Flow Logs.
Logs collection
Within an aggregation interval, packets are sampled. A single flow log entry contains all of the packets gathered for a specific IP connection during the aggregation interval. After that, this data is routed to logging.
By default, logs are kept in Logging for 30 days. Logs can be exported to a supported destination or a custom retention time can be defined if you wish to keep them longer.
Log sampling and processing
Packets leaving and entering a virtual machine (VM) or passing via a gateway, like a VLAN attachment or Cloud VPN tunnel, are sampled by VPC Flow Logs in order to produce flow logs. Following the steps outlined in this section, VPC Flow Logs processes the flow logs after they are generated.
A primary sampling rate is used by VPC Flow Logs to sample packets. The load on the physical host that is executing the virtual machine or gateway at the moment of sampling determines the primary sampling rate, which is dynamic. As the number of packets increases, so does the likelihood of sampling any one IP connection. Neither the primary sampling rate nor the primary flow log sampling procedure are under your control.
Following their generation, the flow logs are processed by VPC Flow Logs using the steps listed below:
Filtering: You can make sure that only logs that meet predetermined standards are produced. You can filter, for instance, such that only logs for a specific virtual machine (VM) or logs with a specific metadata value are generated, while the rest are ignored. See Log filtering for further details.
Aggregation: To create a flow log entry, data from sampling packets is combined over a defined aggregation interval.
Secondary sampling of flow logs: This is a second method of sampling. Flow log entries are further sampled based on a secondary sampling rate parameter that can be adjusted. The flow logs produced by the first flow log sampling procedure are used for the secondary sample. For instance, VPC Flow Logs will sample all flow logs produced by the primary flow log sampling if the secondary sampling rate is set to 1.0, or 100%.
Metadata: All metadata annotations are removed if this option is turned off. You can indicate that all fields or a specific group of fields are kept if you wish to preserve metadata. See Metadata annotations for further details.
Write to Logging: Cloud Logging receives the last log items.
Note: The way that VPC Flow Logs gathers samples cannot be altered. However, as explained in Enable VPC Flow Logs, you can use the Secondary sampling rate parameter to adjust the secondary flow log sampling. Packet mirroring and third-party software-run collector instances are options if you need to examine every packet.
VPC Flow Logs interpolates from the captured packets to make up for lost packets because it does not capture every packet. This occurs when initial and user-configurable sampling settings cause packets to be lost.
Log record captures can be rather substantial, even though Google Cloud does not capture every packet. By modifying the following log collecting factors, you can strike a compromise between your traffic visibility requirements and storage cost requirements:
Aggregation interval: A single log entry is created by combining sampled packets over a given time period. Five seconds (the default), thirty seconds, one minute, five minutes, ten minutes, or fifteen minutes can be used for this time interval.
Secondary sampling rate:
By default, 50% of log items are retained for virtual machines. This value can be set between 1.0 (100 percent, all log entries are kept) and 0.0 (zero percent, no logs are kept).
By default, all log entries are retained for Cloud VPN tunnels and VLAN attachments. This parameter can be set between 1.0 and greater than 0.0.
The names of the source and destination within Google Cloud or the geographic location of external sources and destinations are examples of metadata annotations that are automatically included to flow log entries. To conserve storage capacity, you can disable metadata annotations or specify just specific annotations.
Filtering: Logs are automatically created for each flow that is sampled. Filters can be set to generate logs that only meet specific criteria.
Read more on Govindhtech.com
#VPCFlowLogs#GoogleKubernetesEngine#Virtualmachine#CloudLogging#GoogleCloud#CloudRun#GCPVPCFlowLogs#News#Technews#Technology#Technologynwes#Technologytrends#Govindhtech
0 notes
Text
Kubernetes with HELM: Kubernetes for Absolute Beginners

Kubernetes is an open-source platform that automates the management, scaling, and deployment of containerized applications. Its complexity can be overwhelming for newcomers, especially when it comes to managing Kubernetes workloads in an efficient and simplified manner. HELM, a package manager for Kubernetes, comes into play as a solution for this. In this blog, we’ll explore the basics of Kubernetes, the role of HELM, and how Kubernetes with HELM: Kubernetes for Absolute Beginners can be your gateway into the cloud-native ecosystem.
What is Kubernetes?
Before diving into HELM, it's crucial to understand the core platform: Kubernetes. Kubernetes, often abbreviated as K8s, is a powerful orchestration tool that automates the deployment, management, and scaling of containerized applications. It's widely used in DevOps and IT operations for handling large-scale, distributed systems. The flexibility, scalability, and self-healing nature of Kubernetes make it a favorite for organizations adopting microservices architecture.
Key Concepts in Kubernetes
Nodes: These are the individual servers (or virtual machines) where Kubernetes runs applications. Nodes contain the necessary components for running and managing containers.
Pods: A Pod is the smallest and simplest Kubernetes object. It contains one or more containers that share resources such as networking and storage.
Cluster: A group of nodes working together to manage containerized applications.
Kubelet: This is an agent that runs on each node in the Kubernetes cluster. It ensures containers are running as expected.
Kube-API: The Kubernetes API is the interface for interacting with the Kubernetes cluster. Administrators and developers use it to create, delete, and manage resources.
What is HELM?
HELM is a package manager for Kubernetes, designed to simplify the deployment and management of Kubernetes applications. Think of HELM as the "apt" or "yum" of Kubernetes. It allows users to define, install, and upgrade complex Kubernetes applications. With HELM, developers can easily manage and deploy their applications as packages called Charts.
A HELM Chart is a collection of files that describe a related set of Kubernetes resources. It’s the central concept in HELM, and using these Charts makes Kubernetes simpler for beginners and experts alike.
Why Use HELM with Kubernetes?
The synergy between HELM and Kubernetes is profound. As Kubernetes can be complex to set up and manage, HELM offers a streamlined approach. With HELM, developers can package Kubernetes applications in Charts, allowing for:
Reusable configuration: You can package your configurations and reuse them across multiple environments.
Ease of installation: Installing complex applications on Kubernetes becomes easier with HELM's simplified commands.
Version control: HELM allows for easy upgrades and rollbacks, giving you version control over your Kubernetes deployments.
HELM vs Manual Kubernetes Setup
Without HELM, setting up Kubernetes applications can involve manually defining numerous YAML files for various resources, including services, deployments, and pods. This manual approach is prone to errors and inefficiencies. HELM automates this, turning complex deployments into easy one-liners.
For absolute beginners, this is crucial. HELM abstracts the intricacies of Kubernetes, providing a layer of simplicity and making it accessible to those new to container orchestration.
Getting Started: Kubernetes with HELM for Beginners
Now, let’s dive into how absolute beginners can start using Kubernetes with HELM. If you're just starting with Kubernetes, it might seem intimidating at first. However, by using HELM to manage your Kubernetes applications, you can streamline your learning curve.
1. Installing Kubernetes and HELM
Before using HELM, you need to install Kubernetes. There are several ways to set up a Kubernetes environment, such as using Minikube, Kubeadm, or a managed Kubernetes service like Google Kubernetes Engine (GKE), Amazon EKS, or Azure Kubernetes Service (AKS).
After Kubernetes is set up, installing HELM is straightforward. Here’s how to get started:
Installing HELM:
bash
Copy code
curl https://raw.githubusercontent.com/helm/helm/main/scripts/get-helm-3 | bash
This will install the latest version of HELM on your system.
2. Creating a HELM Chart
Once HELM is installed, you can start creating your first HELM Chart. This will package your application for easy deployment. Use the following command to create a new Chart:
bash
Copy code
helm create my-first-chart
This command generates a basic directory structure for your Chart, including template files for deployments, services, and configuration maps.
3. Deploying a Kubernetes Application with HELM
Deploying your application using HELM is simple. After creating or downloading a HELM Chart, you can install it using the following command:
bash
Copy code
helm install my-release my-first-chart
This command deploys the Kubernetes resources defined in the Chart. In this example, my-release is the name of the deployment, and my-first-chart is the Chart you created earlier.
4. Managing HELM Releases
One of the benefits of HELM is the ease of managing Kubernetes deployments. With HELM, you can easily upgrade or roll back to previous releases.
Upgrading a HELM release:
bash
Copy code
helm upgrade my-release my-first-chart
Rolling back to a previous release:
bash
Copy code
helm rollback my-release 1
These commands are especially useful when managing production environments, as they give you full control over application versions.
HELM and Kubernetes in DevOps
HELM plays a vital role in DevOps pipelines, particularly for teams practicing Continuous Integration (CI) and Continuous Delivery (CD). It simplifies Kubernetes deployments, making it easier to integrate Kubernetes into CI/CD tools such as Jenkins, GitLab, or GitHub Actions.
By packaging Kubernetes applications into Charts, developers can create automated pipelines to deploy, test, and manage applications across multiple environments. HELM allows teams to version control their infrastructure, ensuring that deployments are consistent and reliable.
For organizations adopting a microservices architecture, HELM is especially useful for managing complex, multi-service Kubernetes clusters. Instead of deploying services manually, HELM enables you to automate the process.
Conclusion: Master Kubernetes with HELM
Kubernetes with HELM is a powerful combination that simplifies the management of containerized applications. Whether you are an absolute beginner or an experienced developer, HELM helps in reducing the complexities of Kubernetes. It streamlines the installation, management, and upgrade of Kubernetes applications, making it accessible to anyone starting their journey in the cloud-native world.
By learning Kubernetes with HELM: Kubernetes for Absolute Beginners, you will gain the foundational knowledge needed to manage applications at scale. Start with the basics of Kubernetes, and as you grow, leverage HELM to manage complex deployments with ease.
HELM is especially valuable for DevOps teams and developers working in cloud environments like AWS, Google Cloud, or Azure, where Kubernetes plays a critical role in managing microservices and distributed systems.
0 notes